Managing Entries
The Entries menu lets you view and manipulate entry information, whether you are using online registration or entering data manually. It's also where you go to import or export data when using other tab programs, such as TRPC, or to see a variety of statistics about your tournament. Also included are functions for dealing with invoices and communicating with registrants.
Via the Entries menu, you can access information about any individual entry, judge, or school. Note that most information pages link to one another - so if you are viewing a judge, it's easy to get to their school's complete entry, or vice versa.
Use the Search Box
Usually, the fastest way to find information in Tabroom is to use the search box in the upper right corner of the page.
For example, if you search for a school's name, you'll be taken right to their entry. If you search for a judge's or entry's last name, you'll be taken straight to their info page. If there are multiple items that match your search, you'll be given a list of results.
You can quickly set the focus to the search box by using Ctrl+S on your keyboard. Then, just type your search and press Enter.
School Info
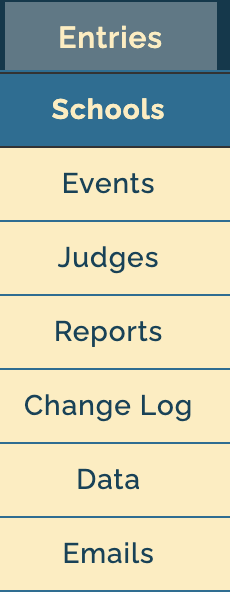
Each school registered for your tournament has it's own page where you can see their entries, judges, vital information, and invoices, as well as mark them as "registered" when they arrive at the tournament. You can access these with the "Schools" menu option.
A few other school related options, such as adding a new school or viewing school statistics are instead found under the "Data" or "Reports" menu options and will be mentioned below.
Accessing a School Page
To access a school's page, you select it from one of the dropdown menus under the Schools menu option:
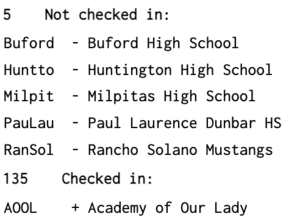
School's will be listed as "Not Checked In" until they are marked as Registered (that is, on site at the tournament), either by you or by the school (if using "On-Site" registration - see the section on General Settings for more info). Once they are registered at the tournament, they will be in the "Checked In" menu instead.
The Judges and Money tabs will appear in red if a school is under their judging obligations, or if they owe judge fees:
Adding A School
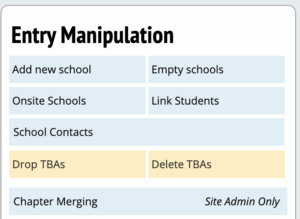
If not using online registration and you need to manually add a school, you use the "Data" menu option, and then click "Add new school" on the sidebar:
If your tournament is listed in a circuit, you'll have the option of adding a school in the same circuit. Otherwise, you can manually add a school by name. If Tabroom finds a matching school with a similar name, you'll be prompted whether to add the pre-existing school or create one from scratch:
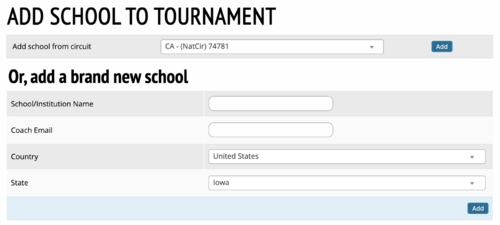
The same section of the sidebar also has options to check on "Empty schools" which have zero entries, and then delete them all en-masse. This can be useful to clean up your tournament data if you have a lot of schools that clicked on your tournament (creating an "entry"), who never actually entered students. There are similar functions for dropping or deleting "TBA" entries from all schools.
General School Info
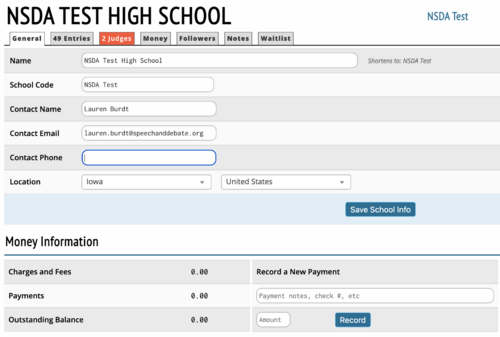
After accessing a school through the Entries - Schools menu, the "General" tab of a school's page lets you edit their basic information, such as name, code and contact information. You can also enter how much they've paid and any relevant notes like a check number or monies owed:
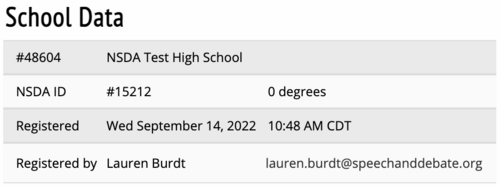
At the bottom, you will see information about the school, who originally registered their school and when, and which tabroom accounts have access to their school account, so you know who to contact if necessary:
To drop the entire school's entry permanently, use the "Drop Entire Entry" link - you will be prompted to confirm first.

Accessing/Adding School Entries
The "Entries" tab of a school's page will first show you the school's complete entry roster:
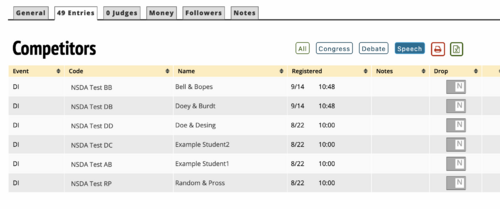
To access any individual entry, just click on their name or code. You can also Drop or Undrop an entry by toggling the button in the Drop column.
For more information on manipulating individual entries, see the section below on the "Events" section.
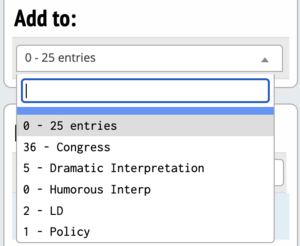
To see only entries in a particular event, click the 'Add to' menu on the right (the number is the current number of entries from the school in that event):
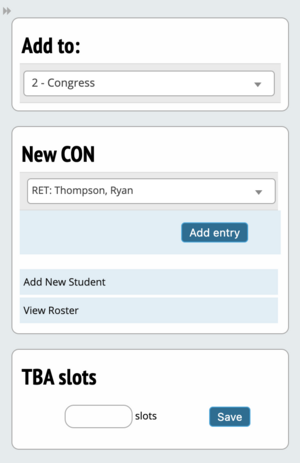
Once you have selected an event, you can manually add an entry, either from that school's roster, by entering their name, or just as a "TBA" slot:
Accessing/Adding School Judges
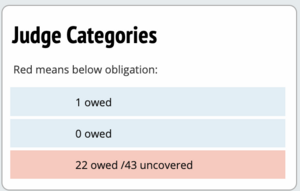
Once you select the "Judges" tab of a school's page, you must then select which judge category to view. If the school is below their obligation in a judge category, it will appear in red:
For each judge category, you will see a list of currently entered judges, with options to change their rounds or delete them:
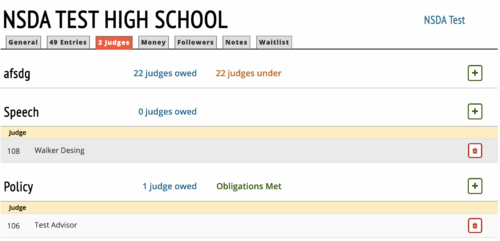
You can also add a new judge to the school by clicking on the plus sign:
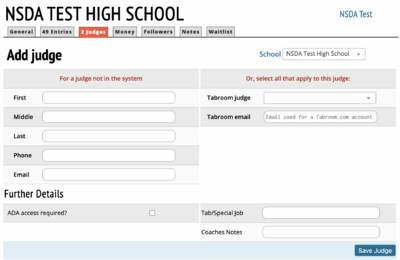
Note that for events using the "Rounds Per Entry" burden method, newly added judges will default to a full (maximum) commitment. Make sure to adjust the newly added judges rounds as necessary.
For more information on manipulating individual judge entries, see the section below on the "Judges" menu item.
Money / Concessions
The "Money" tab of a school page is where you go to view a school's invoice, add and remove fees/fines, and record a school's payment.
The Money tab contains an itemized school invoice with all entry fees, judging fees, purchased concessions, and nuisance fines all in one place. It will update automatically as changes are made to a school's entry (for example dropping a team before the add/drop deadline).
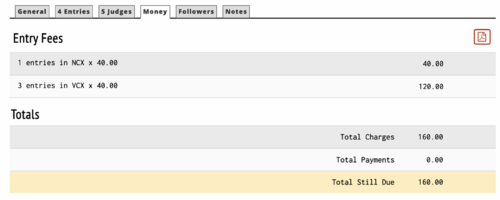
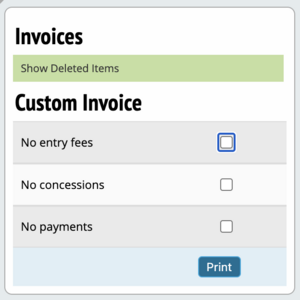
Fees or Nuisance Fines can be removed from a school's invoice by selecting the box next to each charge in the sidebar. Note that after deletion, no record of that charge will remain on the invoice.
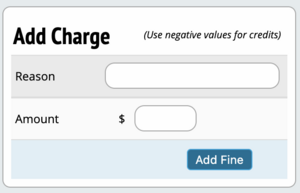
To add additional charges or payments, use the "Add Charge" box on the sidebar. To credit a payment to the invoice, use a negative number for Amount.
If you need a printout of the invoice, for example to hand out at registration (either for entry fees, concessions, or combined), you can generate a PDF using the pdf icon on the invoice:

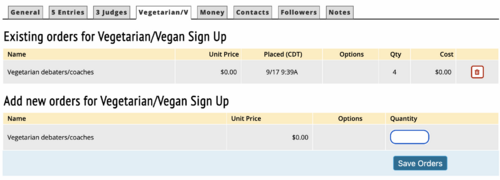
If you have configured concessions available for purchase, you will also see a separate tab for "Concessions," or "Label You Create" which will let you add or remove concessions orders for a school manually. The charges will then update on the main invoice. You can also print out a separate concessions order for the school with the link on the sidebar.
To see information about money and payments in the aggregate rather than one school at a time, you can use the "Reports" menu option instead, and then the "Money/Concessions" section of the sidebar:
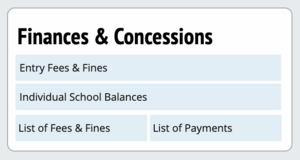
Entry Fees & Fines - Shows an itemized financial report for your entire tournament, including all entry and judge fees and concessions
Individual School Balances - Shows a list of all schools and their related fees, including both unpaid balances and owed refunds.
List of Fees & Fines - Shows a report with all levied fines (such as add/drop nuisance fines or missed judging fees), sorted by school
List of Payments - Shows a report of all schools that have made payments, along with which tournament admin entered receipt of that payment and the date it was recorded.
Concessions Orders - Gives you a list of all ordered concessions per school.
Concessions Totals - Shows you the total amount of concessions and types of concessions ordered for your tournament.
Each report also has the option to print as a PDF or CSV spreadsheet.
School Followers
The "Followers" tab lets you add or remove which Tabroom accounts receive Live Updates for the entire school with pairings/results:

School Registration
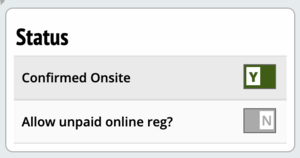
When viewing a school's info page, the "Status" section of the sidebar will show whether a school is registered (i.e. physically at the tournament or completed online registration) or not:
Important Note - Whether a school is marked as "Registered" or not has no effect on their entries - their students and judges will still be considered active, they will still be paired, etc. The Registration system is just designed to make things easier for you organizationally - but using it is totally optional.
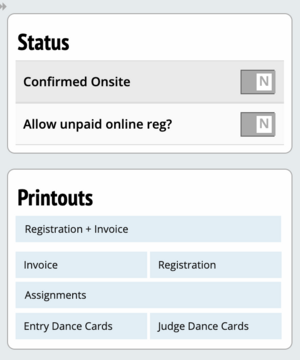
If online "on-site" registration is enabled, a school can mark themselves as registered, otherwise you can do it at registration as schools arrive. To register a school, toggle the 'Confirmed Onsite' button in the sidebar. If you accidentally register a school, you can toggle the same button back to not registered.
The sidebar contains links for a number of useful printouts that can be used at registration, such as entry sheets, invoices, or judge assignments.
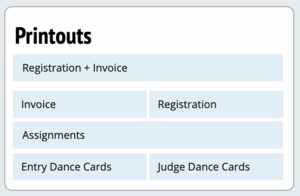
If you want to see the registration status of all schools at once, or print out registration packets, invoices, or dance cards en-masse, you use the "Reports" menu option instead of viewing each school individually. You then use the "Onsite Registration" section of the sidebar:
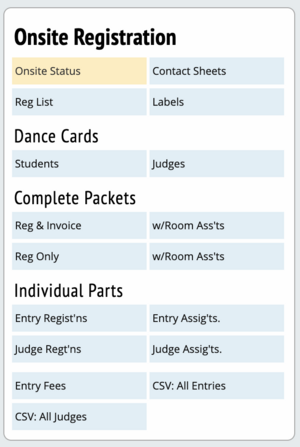
This section lets you view the registration status of each event (so you know whether an event is ready to be paired), as well as print a list of registering schools, dance cards, complete registration packets, or any individual registration item you need, such as invoices or housing assignments.
School Regions
If you want to divide schools into "regions" for the purposes of pairing or judge assignments, you must first enable them in the Tournament Settings. For more information, see the section on General Settings. You also need to toggle the box in Settings - Events - <Event> - Pairing/Sectioning for "Avoid in-region matchups in presets," or assigning regions won't do anything.
Once you have enabled them, you have to create the regions you want to use and then assign each school to a region. You configure regions in Entries - Data, and then the "Edit regions" and "School regions" options.
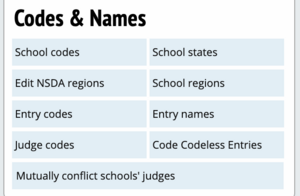
To create the regions you want to use, select "Edit regions," then fill out a name and code for each region:

Once you have created the regions, you have to assign each school to a region. Click the "School regions" option on the sidebar, and then select an option for each school:

You can also select the "School states" option to change which state each school is listed from.
Events / Entry Info
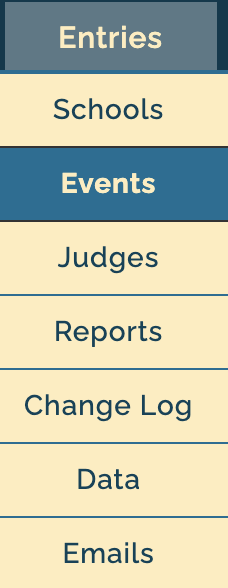
The "Events" menu option lets you access information about individual entries. You can also get to the same place by going through the entry's School page, or by accessing their information directly from the schematic. Whichever way you get there, you end up at the same page.
Entries Overview
After selecting the "Events" menu option, you will see a list of events at the tournament, including the number of active entries, drops, and waitlisted entries in each event:

To access the list of entries in an event, just click on the event name.
If you want a spreadsheet or PDF with all the entry information (or just drops/waitlist, etc.), a master list of entry codes, or a list of which schools are entered in each event, you can use the links on the sidebar:
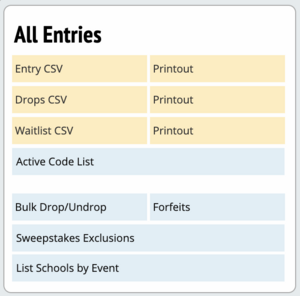
Once you have selected an event, you will see a list of entries in that event:

You can switch to viewing drops or waitlisted entries by choosing the option on the sidebar:
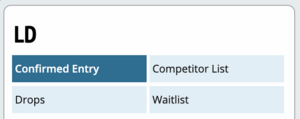
To view an individual entry's information, click on their name or entry code.
Editing An Entry
Once you have selected an individual entry, you can make a variety of changes:

You can manually change their entry name or code, mark whether the entry needs an ADA room, and view their preset seed (if in use). You can also make changes to an individual person's information by clicking on their name (for example to fix a spelling error).
Swapping An Entry
Using the tools on the sidebar, you can make a variety of swaps for an entry:
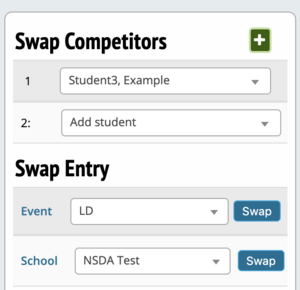
To change which student(s) are part of an entry, use the "Swap Competitors" section and choose a different student from the school's roster in the drop-down list. If they don't appear in the list, you can use the plus sign to "Add competitor not on roster."
Important Note - When swapping a student in an entry, do NOT click on the person's name in the entry information and then edit it there. That will make changes to that person's record on the school's student roster, and should only be used to fix things like a spelling error. If you want to REPLACE a student with someone else, use the "Swap Competitors" section instead.
You can also choose to swap an entry into a different event/division (for example moving an entry in Open down to JV), or switch which school an entry is affiliated with.
Dropping An Entry
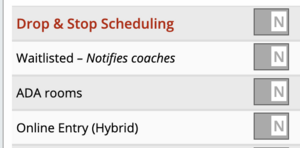
To Drop or Disqualify an entry, use the "Drop & Stop Scheduling" button in the Details section on the sidebar:

Dropping an entry does not automatically remove them from any pairing on which they currently appear (such as rounds in which they have already competed or presets), so you may also need to manually change the schematic to remove them. However, a dropped entry will not be placed on any future schematics.
Once you have dropped an entry, you can un-drop them by using the link on the sidebar, or completely delete them from the system by clicking "Delete Entry Completely." You should rarely need to completely delete an entry - it's usually better to leave them in the system as a drop so there's a record of what happened and when.
You also have the option of Disqualifying an entry. In debate events, this has the same effect as dropping them. In IE's, it will automatically give one extra rank to each competitor who ranked behind the disqualified entry in their rounds.
Editing An Entry's Results
When viewing an entry, you will also see their list of scheduled rounds (with results, if any):

If you click on any opponent, judge, or room, you will be taken directly to that information instead.
To make changes to an individual entry's results, click the "eye" icon in the Action column for the particular round.:

Note that most of the time, you'll make changes to an individual round from the schematic (for example to assign a bye or forfeit), rather than accessing an entry's individual results.
Accessing An Entry's Prefs
To view an entry's pref sheet, first access their entry information, then click the link for "Pref Sheet" on the sidebar. This will show you the prefs they've entered, and allow you to make changes to it directly. Note that pref quotas are not enforced on this screen, so be careful with any manual changes:

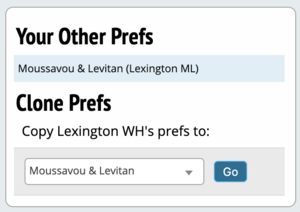
If you want to copy another team from the same school's pref sheet, use the "Clone Prefs" section on the sidebar. Be very careful - once you overwrite a team's prefs, you can't get the original prefs back:
Managing The Waitlist
If you have enabled a waitlist for an event, you can manage it by selecting Entries - Events, choosing an event, and then selecting "Waitlist" on the right. That will show you the entries on the waitlist, with the option of admitting them (including whether to automatically notify coaches):
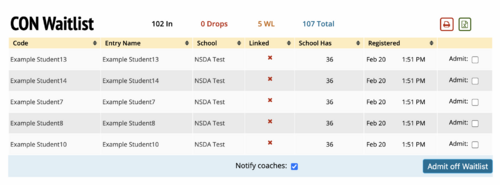
When viewing a school's complete entry, waitlisted entries will be listed as "On Waitlist":

If you view an individual entry on the waitlist, you will see options on the sidebar for admitting that single entry:
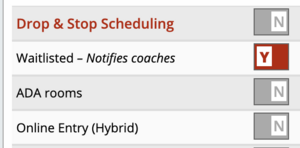
Or, you can re-waitlist an entry by toggling the "Waitlisted - Notifies coaches" button.
Re-coding Entry Codes
Sometimes, it's necessary to re-assign the codes for schools, entries, or judges. For example, if you make a change to the entry code style for an event (such as switching from First/Last to a numeric code), but already have some entries with the old code style, you can "re-code" the entire event to make sure all entries have the correct codes.
It's frequently helpful to run a recode on all events right before you start pairing- just to ensure that all the entry codes are in the correct format, reflect the correct names, etc.
Re-coding functions are found under Entries - Data, and the "Codes & Names" section of the sidebar:
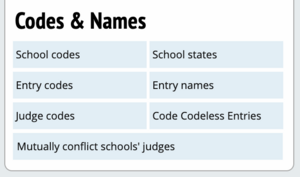
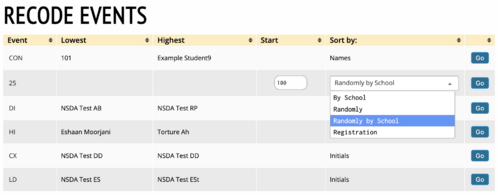
From there, you can re-code schools, entries (by event), or judges. For example, to recode the entries for an event, you select "Entry codes," then set a code value to start from and a sorting method and click Go:
Entry Stats
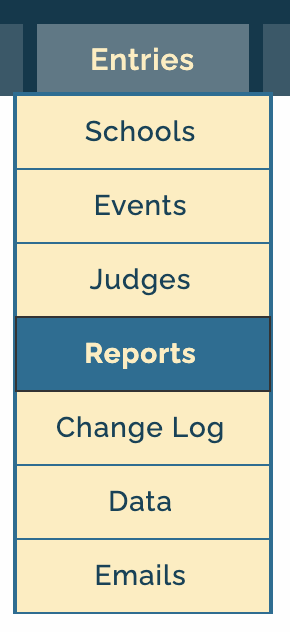
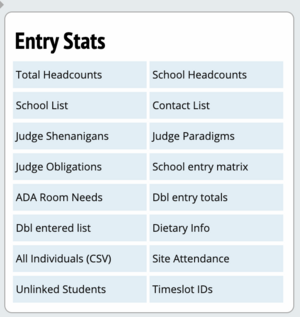
You can access a variety of statistics about your tournament using the Entries - Reports menu, including generating a PDF for each type of report:
Total Headcounts - Generates a report with the total number of schools, entries, judges, regions, and people, also broken down by event and judge group.
School Headcounts - Shows a headcount for each school, including the number of judges and students.
School List - Shows a list of all the schools entered in the tournament, including whether they are registered.
Dbl entry totals - Lets you keep tabs on which students are double entered, so you can prevent any mistakes or verify at registration.
Judge Shenanigans - This report will check for a variety of common entry errors, such as judges with the same name entered in multiple events. It's usually a good idea to check this report at least once before pairing the first round to make sure you haven't missed anything.
Judge Obligations - Lists each school and whether they are above or below their judging obligation for each event.
ADA Room Needs - Lists all entries or judges that have been marked as needing ADA accommodations.
Preset Seeds
Before you can assign seeds to each team for use in pairing preset rounds, you must first set a preset seeding method in your Event Settings, in Settings - Events - <Event> - Pairing. For more information, see the section on Events.
Make sure to choose a pairing method that corresponds to the number of seed categories and presets you use. For example, if you choose "Hit All Seed Categories" and have 2 presets, you should have 2 seed categories.
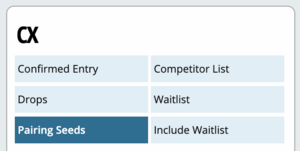
Once you have enabled preset seeding for an event, you will see an option for "Pairing Seeds" on the sidebar when viewing that event in Entries - Events:
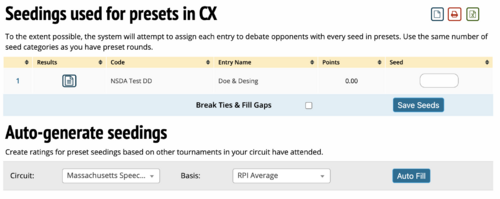
For each entry, you can assign a numeric seed (usually, 1-4), and view that entry's record for help in determining their correct seed placement. You can also choose to auto-generate seedings based on tournaments in your region that the entries have previously attended:
Judge Info
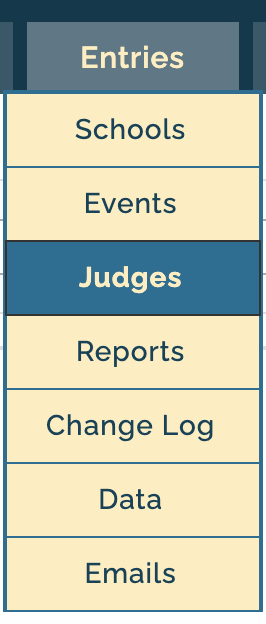
The "Judges" menu option is usually the easiest place to access judge information, though as with entry information, you can access the same page through a school's info or the schematic.
Judges Overview
The "Judges" menu option will first show you an overview of all your judge categories, including the total number of judges and obligated rounds in each category, along with hire requests, if any:
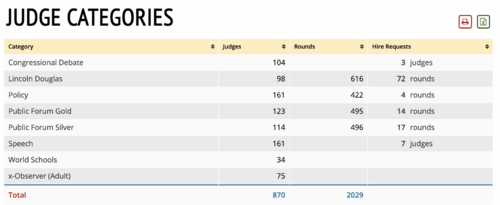
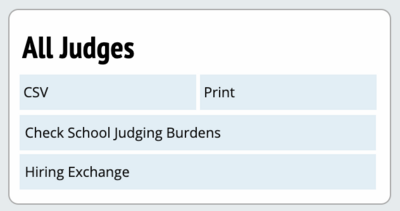
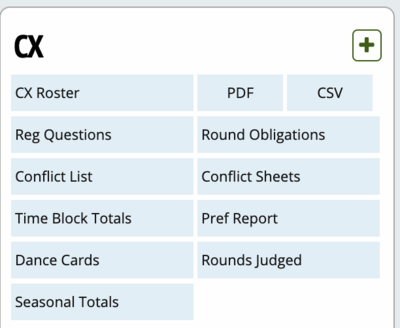
The links on the sidebar lets you download a CSV spreadsheet or PDF of all judges, check school judge burdens, and see which judges have offered rounds through the hiring exchange. To access broad information such as how many rounds each judge in the pool has judged so far in the current season, choose a specific judge category then make your choice from the sidebar :
Judge Category Info
To see more detail, you can click on a judge category in the list, or select it from the sidebar. You will then be shown the list of judges in that judge category, including their round commitment, code/school, and any notes included by the coach. Judges marked as "Inactive" will be shown in red.

Make sure to scan the coaches notes before pairing your first round, as coaches frequently include availability information in the Notes field (e.g. "Not available round 1") instead of using time blocks correctly.
To get more info on the judge group, use the links on the sidebar:
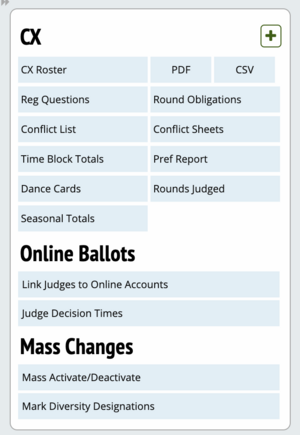
This gives you options to see all judges, conflict sheets, the pref report or the ability to add a new judge to the judge group manually (for example for a late add or a new hired judge).
To edit the round obligations or hiring availability for all judges in the group en-masse, you can use the "Round Obligations" link.
To access the information for any individual judge, click their name or code.
Individual Judge Info
When viewing an individual judges' info page, you have a variety of options:
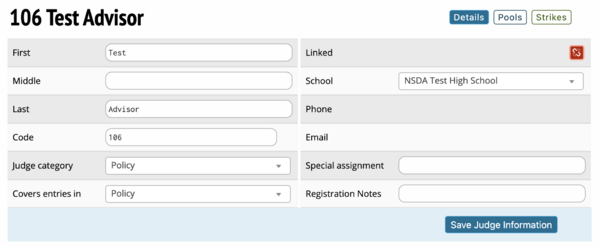
If the event is using online ballots, you will see a box that allows you to link a judge entry to a Tabroom account manually, or unlink it if it was linked in error.
You can edit the judges name, judge code, school affiliation, and contact info, such as email and phone. You can also move a judge to a different judge group by using the dropdown box, or change which event they count towards covering an obligation for a school - so for example you could have a judge in JV covering an Open team's judging obligation.
You can also make changes to their round obligation or available hired rounds, and change which sub-pools they are available for.
If necessary, you can drop the judge using the "Wreak Havoc" section on the sidebar. Usually, it's better to just mark a judge as "Inactive" by changing the Active button to "No." That will prevent them from being paneled, but will make it easy to re-enable them if they become available again.
Judge Availability / Strikes
In Tabroom, any reason that a judge can't judge a particular debate is considered a "strike" - so there are several different types of strikes:
MPJ strikes - given by competitors if you have MPJ configured, this is what most people normally think of when they think "strike."
Competitor conflicts - any reason that a judge can't judge a particular student/entry, such as having previously coached them. This is normally what is thought of as a "preclusion" or "constraint."
School conflicts - When a judge can't judge a particular school, for example because they've recently coached there.
Region conflict - Prevents a judge from judging any school in a particular region (if using regions in the tournament settings).
Event/Division strike - Precludes a judge from judging particular divisions (including just in elims), such as preventing a judge from judging Open. This is most useful when you have a combined judge group that can see multiple events.
Time strikes - Tabroom treats any time during which a judge is unavailable as a "strike." So instead of marking a judge as unavailable for "Round 1," you have to mark a judge as unavailable for the times during which you have scheduled Round 1 (e.g. 8-10am for example). This is because people are usually not available at particular times (e.g. because of an appointment), not really because that time happens to be Round 1. Striking a judge by time is ultimately more useful, since a round may be rescheduled for a variety of reasons - and you would want the judge to be able to judge that round if it ended up occurring at a different time at which they were available.
To add any kind of strike (other than MPJ strikes, which are added by competitors on their pref sheets), you access the judge's info sheet and then click the "Strikes" box at the top:
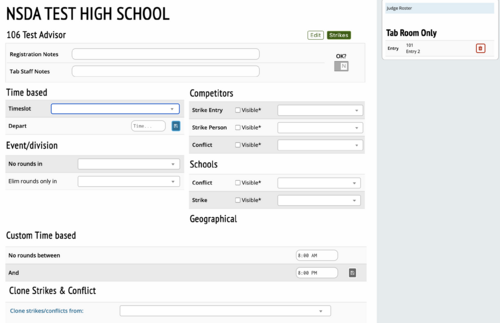
You will then be given the option of adding any of the previously discussed types of strikes:
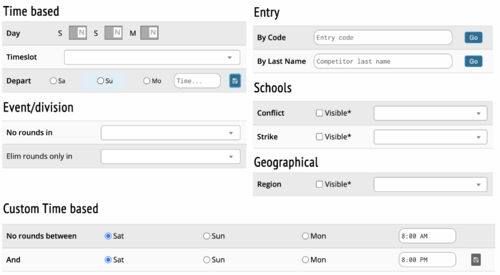
Important Note - When adding a time strike for a judge, be careful about the end time you select. If you have your schedule configured such that one round's end time is the same as the next round's start time, then a time strike placed on the boundary will prevent the judge being placed in either round, which is usually not the intended effect. So, for example, if you have Round 1 configured from 8-10 and Round 2 from 10-12, then giving a judge a time strike from 9-10 will prevent them judging either Round 1 or 2, because they are "unavailable" at exactly 10am. To prevent this, configure your scheduled time slots so that Round 1 ends at, for example, 9:30 instead of 10, and then give the judge a time strike from 9-9:55.
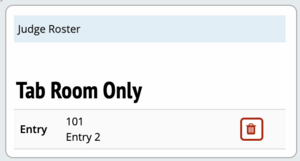
To remove any "strike," view the judge's info sheet, and click on the trash can next to the strike you want to delete on the list in the sidebar:
One final option is found under Entries - Data, and lets you select "Mutually conflict schools' judges" to prevent two schools from judging each other. This can be useful when two schools share a judging/coaching staff, for example.
Judging Pref Reports
To see aggregate information about the prefs for judges in the judge group, use the "Pref Report" link on the sidebar from the main judge group screen.. This will show you the average pref and standard deviation for each judge in the pool, which can help find out who your "most preferred" judges are, for example to ask them to donate additional rounds or to ensure you don't burn them too early.
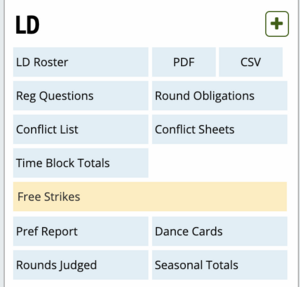
Depending on how you configure MPJ for the judge group, you may also have additional options on the sidebar to see free strikes, check time block totals or see all conflicts in one place:
To see how all entries rated a particular judge, first access that judge's info page, then click the "Pref Sheet in CX (example)" link on the sidebar.
School Judging Burdens
To check which schools are above or below their judging obligations, select the "Check School Judging Burdens" link on the sidebar from the main judges page. You will then see a list of schools and their outstanding commitment in each judge group:
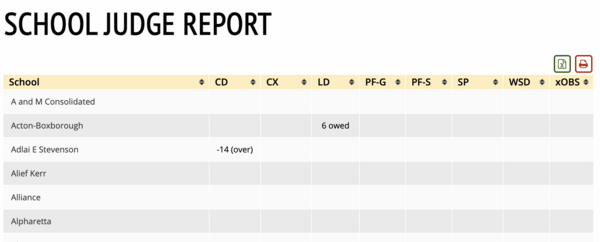
If a school is under their commitment, it will show as "X owed" where X is the number of rounds they are under. If a school has too much judging, it will be listed as a negative number and says "-X (over)" instead. If a school has exactly the right amount to meet their commitment, that column will be blank.
A related report is available under Entries - Reports, and the link for "Judge Obligations" on the sidebar. This will show you a list of schools and whether they are above or below their obligation in each event.
Linking Judge Accounts
If you are using online ballots for a judge group, you will see an additional section on the sidebar when viewing that judge group. This will give you options to manually link judge entries to their Tabroom accounts, or to approve requests from judges to do the linking (the link will appear in Red if there are active requests):
Hired Judges
There are two different methods of offering hired judging, both of which may be used alone or simultaneously. You can offer tournament-provided hired judging and then let people request hired rounds, and/or you can enable a "hiring exchange" where judges can offer hired rounds and schools can hire them without you needing to manually match them up.
For more information on enabling hired judging, see the section on Judge Groups.
Hired Judging Requests
If you have enabled tournament-provided hired judging for a judge group, you will see a a link on the sidebar for "Hire Requests."
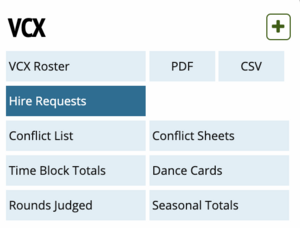
This will show you the list of hire requests and allow you to fully or partially accept them. The coach who made the request will then be notified by email of any changes in the status of their request:

Hiring Exchange
If you have enabled a "hiring exchange," for a judge group, you can view offers and hires by selecting "Hiring Exchange" on the sidebar:
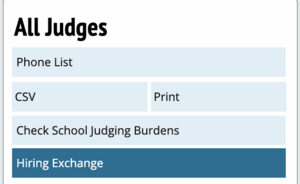
This will show you a list of pending and accepted offers, and let you approve (or unapprove) judges requests to be on the exchange:

To cancel a specific hire request, you can click a judges name to view their info sheet, and then remove the hire request by clicking on it on the sidebar.
Change Log
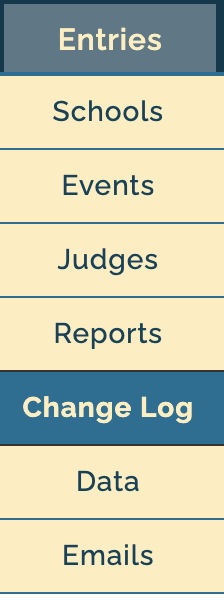
Tabroom keeps a log of most of the changes you make to your tournament as they happen, such as entry drops or pairing a round. The "Change Log" menu option lets you view these logs, which can make it easier to track down when something happened or who made a particular change.
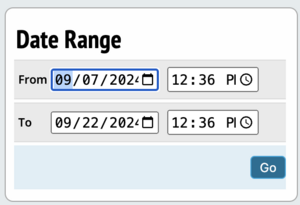
First, you should set a date range on the sidebar - it's usually helpful to include a little extra on each side of your range, just in case you were wrong about the time:
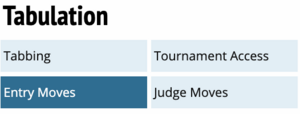
Then, choose which log you want to view, including Entry/Judge drops or moves, or the full tabulation log:
Importing / Exporting Data
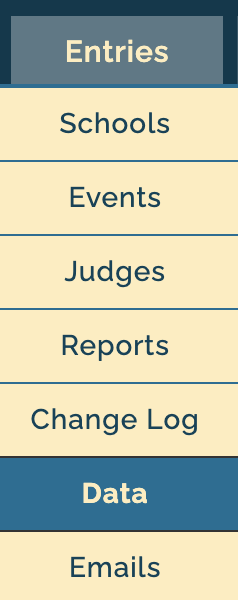
In addition to adding schools or re-coding entry/judge codes, the "Data" menu option is where you can import or export your full tournament data, either to create a backup if the internet breaks, or to allow going back and forth between other tabbing programs, such as Joy of Tournaments or TRPC.
Importing Data
Tabroom can import entry data (including schools and judges) from a variety of sources, including the "Universal XML" format used by the TRPC, CAT, and STA, as well as importing registration data from Joy of Tournaments:
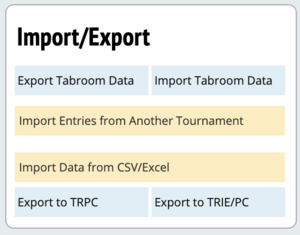
To import, select the option from the sidebar which matches the source of your data, and follow the instructions to upload your data file.
Important Note - For most import methods, such as Joy of Tournaments, you must have already created the Judge Groups and Events in Tabroom to exactly match the incoming data. So, for example, if you have an event in Joy called "LD," it must also be called "LD" in Tabroom, not "Lincoln Douglas," otherwise the import will fail. Make sure to exactly follow the instructions on screen for your chosen import method.
Depending on the import method you choose, there may be some data which cannot be imported automatically - make sure to read the on-screen instructions for any warnings. For example, when importing Joy of Tournaments data, time constraints are not imported, but are instead listed in the "Notes" field for each judge - so you'll need to re-enter them manually.
Exporting Data
Tabroom can export your tournament data for use in another tabbing program, such as TRPC, the CAT, or STA. This can also be useful as a periodic backup mechanism if the internet were to fail at your tournament. So, for example, you could save a TRPC export after each round, so that in an emergency you could load the current state of your tournament offline and continue tabbing.
To export your data, choose an option from the "Import/Export" section on the sidebar.
Make sure to read through the on-screen instructions for further information on using your exported data.
Resetting The Tournament
If necessary, you can also completely reset your tournament data using the link on the sidebar. For obvious reasons, this shouldn't be done once a tournament has started - once you've deleted everything, there's no way to get the data back.
Emails
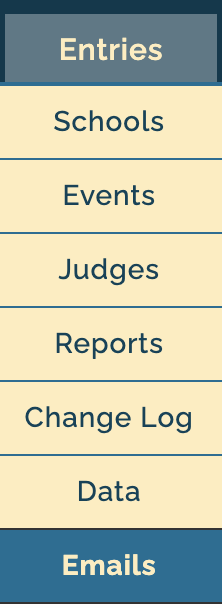
Tabroom's built-in email functions make it easy to contact all your tournament participants with important notifications and information. To use them, select the "Emails" menu option. Note that this is distinct from the "blasting" of pairings via email/web notification, which is done directly from the schematic - the "Emails" section is instead for communicating general information to the tournament.
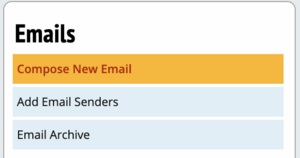
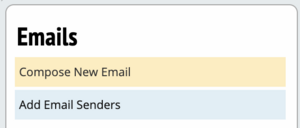
To email the tournament, click "Compose New Email" on the sidebar:
Fill out a subject line and email message in the boxes provided, and then make sure to select who to send it to:
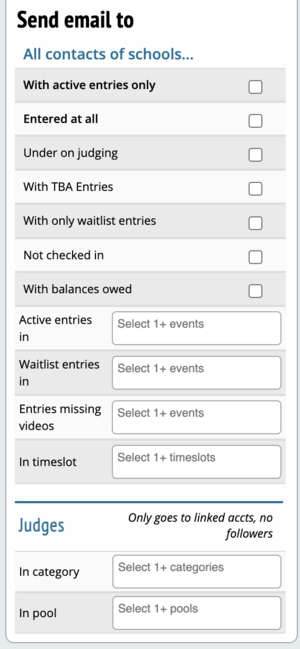
You must choose at least one group to send to - you can choose to send the email to all coaches, or just a subset of coaches or judges.
Once you have sent an email, you can view it in the "Email Archive" on the sidebar:
